TRUMPETER 00217 BR86 Dampflokomotive

Well, after a long time turning a 670+ parts kit to about 2500+ part kit, The build is finally complete. Sadly I've lost the early photos of the build so it starts pretty much half way.
Be aware, this is a simplified version of the Lokomotive if built straight out of the box but still builds to a lovely model as it is. But if you want that eye popping extra detail, then your work is cut out for you. Fortunately, there is an excellent reference book from Wings & Wheels Publications called Dampflok BR 86 Train in Detail No.2. Well worth the purchase. There are 4 Loks covered, 3 restored and many fotos of a rusted specimen. All have differences and you'll look time and time again at the photos trying to work out which pipe goes where etc.

I also used three aftermarket kits from LZ models. These were LZ 1/35 Upgrade set for BR 86 Tolkien-Knorr Compressor and Tolkien-Knorr Water Feeding Pump, Upgrade set No.2 for BR 86 and Upgrade set No.3 for BR 86 Boiler Armature. There are 2 more upgrade sets available, No.4 not required for my build and No.5 were replacement wheels but I was happy with the kit version.
Also used were numerous nuts and bolt heads from Meng Models, plenty of brass rod, copper wire and Evergreen plastic.
Steps 1 and 2 deal with the rail assembly.
There are 2 options of the Lok to build, just aesthetics and nothing major. The book may help you to decide which is to your liking.
Step 3 starts with the chassis. Fairly straight forward and it is imperative to keep the chassis square and flat. I weighted it down using a book after gluing with Tamiya quick setting cement. There are quite a few ejector pin holes you will need to fill in first.
Step 4 is a continuing of the chassis. Again be on the look out for ejector pin holes. My preferred method of filling is superglue followed by zip kicker and then sand flat straight away. It looks like a hole still as it's clear (see on foto later) but smooth and quick. Now is the time to start placing all the nuts, bolts or rivet heads on the chassis before proceeding further.

Step 5 starts with the suspension / some wheels and steps. Trouble free and straight forward.
Step 6 continuing the top side of the chassis. Time for more rivets and bolt heads and piping.


I've added all the detail for the steam water drain cocks and connected it right through to the cabin. Quite necessary if you don't want to blow the cylinders apart.
On page 9 which is the unlabelled Step 7, top right and bottom left calls for gluing parts J25 and J17 for these sub assemblies. I held off and waited till the boiler assembly was dry fitted in order to get the correct angles.
Step 8 continues top of the chassis with the pressure tanks among other things. Now is the time for more bolt / rivets, pipe work with brass and Evergreen rods.

1, holes ready for bolts (some extra too which I had to fill in, looking at the wrong Lok). 2, the assembly for throttle adjustment and 3, holes filled. Not sure why Trumpeter had them, every foto shows it closed off.
Step 9 more steps if you'll pardon the pun.
Steps 10, 11 and 12 is construction of the boiler. It comes in 2 halves and just like assembling a model aircraft fuselage, you have to get this right and smooth. Fortunately there are no fine lines or rivets to watch out for when sanding. This is also where some extra scratch building detail that needs to be added such as piping, handles and hinges.


Step 13 is more boiler work and the beginning of the cabin firebox. We careful when gluing the front cabin wall on. I glued the floor, part K12 from Step 14 first. I also had the cabin side walls, parts L11 and L14 ready to dry fit. You need it to get the front wall alligned correctly. I also had a plastic off cut taped to the top of the firebox to aid alignment.

Above, you'll see the superglue filled ejector pin marks on the front cabin wall. The foot pedals were added to levers and the like which are below the floor.

Ash pan doors and levers.

The red arrow point to the flues which were opened for draught depending which way the Lok was traveling. Fine mesh wire used but hard to see now the Lok is assembled.
Steps 15,16 and 17 continues with the Cabin, roof and Boiler base. The roof I left off till after painting. Lots and lots of detail can be added here, both after market, scratch and fix errors. Leave off the windows obviously till after painting.


The added detail on the cabin roof...yes another 60 parts added!
Lots of rear cabin detail added including wall hooks for the shovel, rake and poker.

Wire for the light added, plus door detail.
Steps 18, 19, 20, 21 and 22 are primarily wheels and extras related. Sadly the soft flexible black plastic pipes (sand pipes) are one disappointing feature. They're too flexible and the paint cracks and flakes off easily. The grey plastic would have been a much better option. It is also difficult to secure near the base of the wheels and move out of position when the Lok is picked up.


There is no need to glue any of the wheels on. Even with all the extra detailing added, I was still able to wiggle them off for painting and then put them back in.
Step 23 and 24 deal with the water tank construction and fitment. The left side tank needs modification to correct an error especially so when fitting the LZ models Tolkien-Knorr Compressor. Refer to the book. There are numerous scratch build extras to add here as they are simply not provided in the kit. Again, I would not glue in situ until painting completed.

Handles and brackets for water tank, can be opened from inside cabin.

Tool brackets for poker, scrapers

Modification of simplified kit left tank to accommodate the Tolkien-Knorr compressor
Step 25 is fitting last few breakable parts.
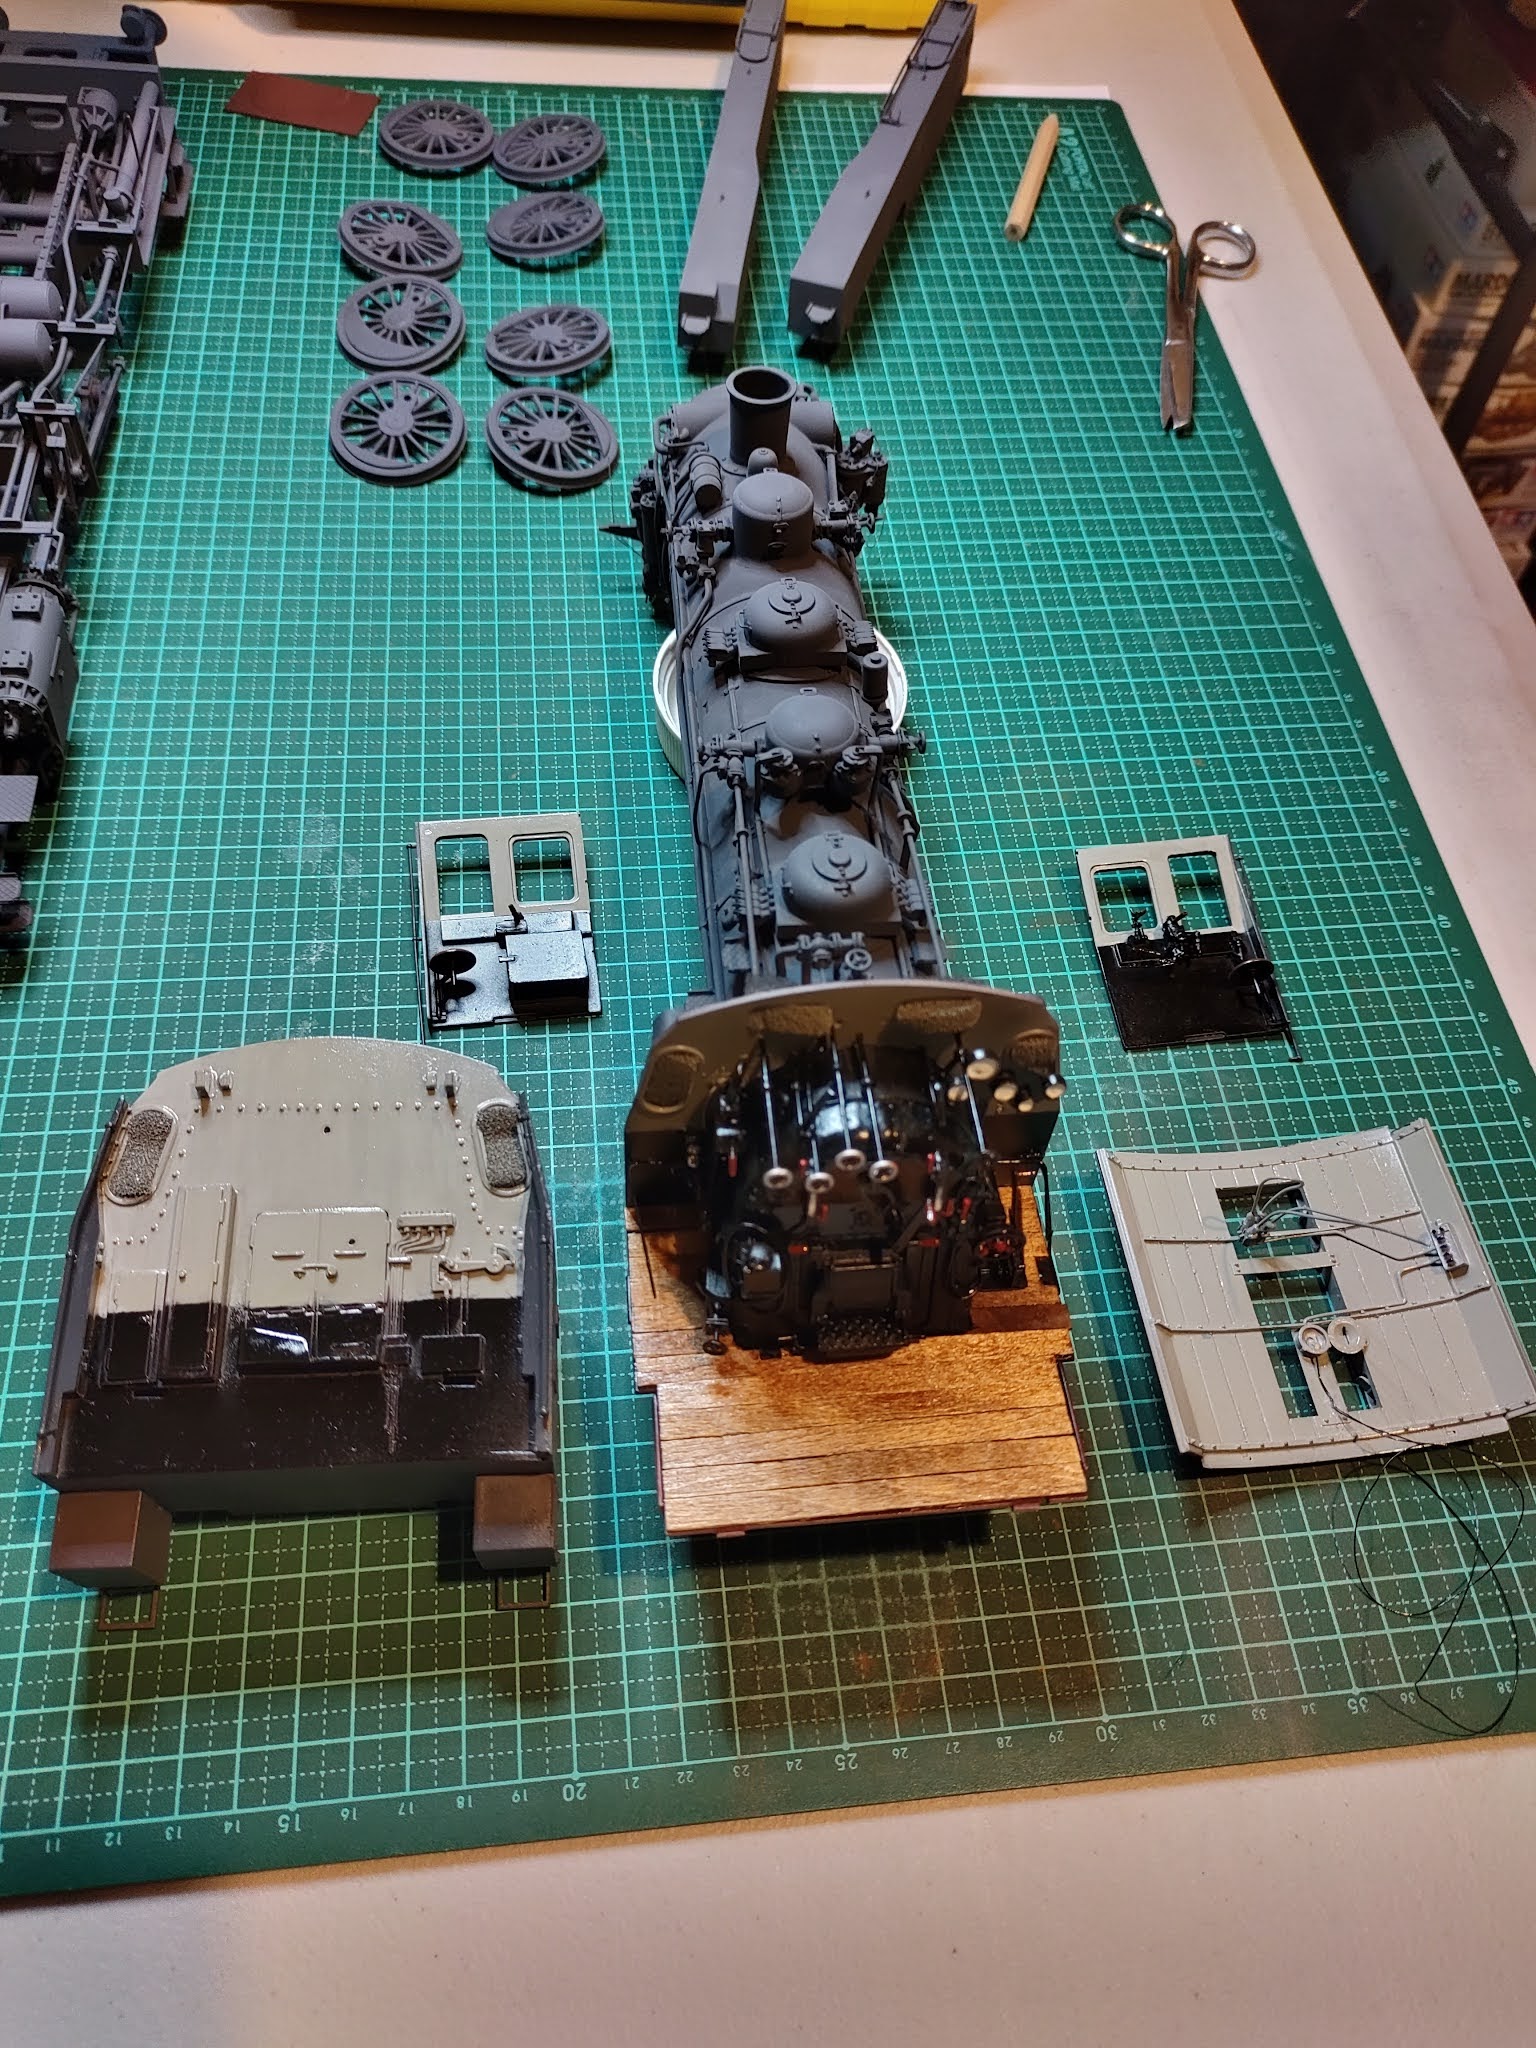
What follows now are dry fitting pre-painting fotos.


Next came Vallejo German Red Brown Primer followed by Testors Glosscote.

I chose a cabin paint scheme from the reference book purely for it's startling contrast.


The floor was made using craft sticks from the local $2 junk shop and painted with Cabot's Cedar Satin stain and varnish. The walls with Tamiya XF19 Sky Grey and X18 semi gloss black. The externals were sprayed XF63 German Grey. It was then sealed with Testors Dullcote. Where the decal locations were, I gave a spray of Glosscote.
I used Vallejo Natural Iron Oxide for the soot and coal dust weathering inside the cabin.


The decals came next. I found the Trumpeter decals thick and poorly defined so I used the BR86 decals from Peddinghaus. Sadly they were also quite thick but well defined. After application I sprayed 2 layers of Dullcote over it and began to thin them, the edges in particular with 1200 wet and dry sand paper. I was quite nervous about this but it worked a treat as well as aging the 'Wheels rolling for victory' decals on the water tanks.

Weathering the Lok itself was a multi level task. Pigments, laquer, repeat, repeat and repeat. My choice of pigments for this area were all MIG, Old Rust, Medium Rust, Light Rust, Panzer Grey (fading) and Allied Green (fading). Used some graphite powders and the good old lead pencil.


The light globes (not supplied in the kit) are made from Evergreen rod with a small drop of superglue x 6.


The finished BR86 Lok.
My aim was to portray and end of war, beaten up work horse, in a time of destruction, lack of supplies and repair ability.

Overall, a complex challenging build that took me some 21 months from start to completion with a 5 month break in the middle to settle the brain down with something easier.
A BR52 is coming.....